label maker instructions

A label maker is a portable device that uses thermal printing technology to create customizable labels for organization and efficiency․ Ideal for offices, homes, or classrooms, these tools simplify tasks like labeling files, cables, and storage containers․ With built-in keyboards, Bluetooth connectivity, and adjustable settings, label makers offer a user-friendly solution for creating clear, professional labels․ They are versatile, time-saving, and essential for enhancing productivity and organization in various settings․

What Is a Label Maker?

A label maker is a portable electronic device designed to create customizable labels for various purposes․ It uses thermal printing technology to produce clear, durable text on adhesive tapes․ These devices often feature keyboards for typing, adjustable settings for font sizes and styles, and compatibility with different tape widths․ Label makers are commonly used in offices, homes, and classrooms to organize files, cables, and storage containers․ They offer a convenient way to create professional-looking labels, making them an essential tool for enhancing productivity and efficiency in both personal and professional environments․

Why Use a Label Maker?

A label maker is an essential tool for enhancing organization, efficiency, and clarity in various settings․ It helps create professional-looking labels for files, cables, storage containers, and more, saving time and reducing clutter․ With a label maker, you can easily identify items, improving accessibility and productivity․ Its portability and ease of use make it ideal for offices, homes, classrooms, and event planning․ Additionally, label makers support creativity, allowing you to design custom stickers, gift tags, and personalized labels․ By streamlining labeling tasks, they help maintain a tidy and organized environment, making them a valuable investment for both personal and professional use․

Popular Types of Label Makers

Label makers come in various types to suit different needs․ Manual label makers are simple, portable, and ideal for basic labeling tasks․ Thermal label makers use heat to print labels and are popular for their durability and clarity․ Bluetooth label makers offer wireless connectivity, allowing users to print labels from mobile devices․ PC-connected label makers are designed for high-volume use and offer advanced customization options․ Additionally, some label makers combine multiple features, such as built-in keyboards, adjustable font sizes, and symbol libraries, making them versatile tools for both personal and professional use․

Setting Up Your Label Maker

Unbox and insert batteries or connect power, then install the software․ Sync the label maker with your computer or mobile device for seamless operation and customization․

Unboxing and Initial Setup

Start by carefully unboxing your label maker, ensuring all components are included․ This typically includes the device, label tape, batteries, and a user manual․ Before first use, install the batteries or connect the power cable as specified․ Some models require alkaline batteries, while others may come with a rechargeable option․ Gently remove any protective packaging from the device and ensure the label tape is properly loaded․ Avoid pulling or applying pressure to the tape, as this could damage the cassette or printer․ Finally, familiarize yourself with the keyboard layout and basic controls before proceeding to software installation or first use․

Inserting Batteries or Connecting Power

Begin by inserting the required batteries or connecting the power cable․ Most label makers use high-capacity AA alkaline batteries, while others may have rechargeable options․ For battery-powered models, open the compartment, usually located on the back or bottom, and insert the batteries as indicated․ Ensure the polarity matches the diagram․ If using a power adapter, plug it into the device and a power outlet․ Some models, like the Brother P-touch series, require turning on the device after inserting batteries․ Always use the recommended battery type to avoid damage․ For rechargeable options, charge the device fully before first use․ Turn on the label maker to confirm power functionality․

Installing Label Maker Software

To install the label maker software, visit the manufacturer’s official website, such as DYMO or Brother, and download the correct software for your model․ Run the installer and follow the on-screen instructions to complete the installation․ Some models, like Brother label makers, require apps like PT Design Print or PTouchDirect․ Ensure your device is connected to your computer or mobile device after installation․ Refer to the user manual for specific instructions, as some models may require additional drivers or updates․ Proper installation ensures seamless functionality and access to advanced features․ Always use software from trusted sources to avoid compatibility issues․

Syncing with Computer or Mobile Device

To sync your label maker with a computer or mobile device, start by enabling Bluetooth on both devices․ For models like Brother label makers, download and install the PT Design Print app․ Ensure the label maker is turned on, with a green light indicating it’s ready to connect․ Follow in-app instructions to pair the devices․ For wired connections, use a USB cable to link the label maker to your computer․ Ensure the device is recognized by your operating system and the label maker software․ Some models, like DYMO devices, may require specific drivers or updates for seamless connectivity․ A stable connection is essential for printing labels wirelessly or via cable․

Basic Operations

Basic operations involve loading label tape, typing text, selecting fonts, and printing labels․ These steps ensure efficient and clear labeling for various tasks and projects․

Loading the Label Tape

Loading the label tape is a straightforward process that ensures your label maker is ready for use․ Start by cutting the label tape to the desired length or use a pre-cut roll․ Align the tape with the maker’s slot, ensuring it matches the device’s specified width․ Gently insert the tape into the machine until it clicks into place․ For thermal label makers, the tape should be loaded with the thermal side facing the print head․ Avoid touching the thermal side to prevent damage․ Once loaded, the device is ready to print labels․ Proper loading ensures clear, professional results․ Use compatible tape sizes, such as 12mm or 24mm, for optimal performance․

Typing and Editing Text

Typing and editing text on a label maker is designed to be intuitive․ Use the built-in keyboard to input your desired text, and navigate using arrow keys to move between characters․ Many models allow editing before printing, enabling you to delete or modify text using the backspace button․ For more complex designs, connect your label maker to a computer or mobile app, where you can type and edit labels with greater ease․ Ensure the text fits within the tape width by previewing it on the device or app․ This step ensures your labels are clear, professional, and accurately formatted before printing begins․

Selecting Font Styles and Sizes

Selecting font styles and sizes on a label maker enhances label clarity and aesthetics․ Use the arrow keys to navigate through available fonts, typically ranging from standard to bold or italic․ Choose from multiple size options to fit your label’s design․ Preview the text on the display to ensure proper formatting․ Some models allow switching between uppercase and lowercase letters․ For advanced customization, connect your label maker to a computer or app, enabling access to a wider range of fonts and sizes․ This feature ensures your labels are visually appealing and easy to read, meeting your specific organizational needs effectively․

Printing Your First Label

Printing your first label is straightforward once the label maker is set up․ Load the label tape, enter your desired text, and select font styles and sizes․ Use the preview screen to review your label before printing․ Press the print button to produce the label․ Ensure the tape is aligned correctly to avoid errors․ For precise cuts, use the automatic cutter if available․ Test the label on a surface to confirm adhesive strength․ If using iron-on labels, follow the manufacturer’s instructions for application․ This process ensures your labels are clear, professional, and ready for immediate use, making organization effortless and efficient;

Advanced Features

Advanced features enhance customization and efficiency, allowing users to add symbols, use various label sizes, adjust print settings, and enable automatic cutting for precise, professional results every time․

Customizing Labels with Symbols

Customizing labels with symbols enhances their visual appeal and functionality․ Many label makers, such as Brother P-Touch and DYMO models, offer built-in symbol libraries․ Users can access these symbols through the device’s menu or accompanying software․ This feature is ideal for adding icons, arrows, or logos to labels, making them more professional and engaging․ For example, users can add a warning symbol to cables or a decorative icon to gift tags․ Some devices even allow importing custom symbols or images, expanding creative possibilities․ This feature is particularly useful for organizing tasks, creating event badges, or designing custom stickers with a personal touch․

Using Different Label Sizes

Label makers support various label sizes, catering to different needs․ Common sizes include 12mm, 24mm, and 36mm widths, suitable for tasks like labeling cables or storage containers․ Users can switch tapes to match their project requirements․ For instance, narrower tapes are ideal for small items, while wider tapes are better for large containers or event badges․ Many devices automatically detect tape size, ensuring proper formatting․ Some models also offer adjustable settings to customize label length and layout․ This versatility allows users to create labels that fit perfectly, enhancing organization and readability in both personal and professional settings․

Adjusting Print Settings

Adjusting print settings on a label maker allows for customization to suit various needs․ Users can modify font size, style, and alignment to enhance readability․ Many devices offer bold or italic options, while some support multiple lines of text․ Print density can also be adjusted for clearer labels․ Advanced models enable margin and spacing adjustments, ensuring precise label formatting․ Some label makers include a preview feature to review labels before printing, reducing errors․ Adjusting these settings often involves using the device’s keyboard or companion software․ Properly configured print settings ensure labels are professional, legible, and tailored to their intended use, whether for files, cables, or storage containers․

Cutting Labels Automatically

Many label makers feature an automatic cutting function, which trims labels to the desired length after printing․ This saves time and eliminates the need for scissors․ Some models offer a partial cut option, leaving a small tab for easy removal, while others provide a full cut for standalone labels․ Advanced devices may include sensors that detect label length and adjust cuts accordingly․ Automatic cutting ensures consistent and precise label edges, reducing waste and improving efficiency․ For optimal results, ensure the tape is loaded correctly and the cutter is clean․ This feature is especially useful for high-volume labeling tasks, streamlining the process significantly․

Troubleshooting Common Issues

Resolve tape jams by turning off the label maker, removing the tape, and gently clearing obstructions․ Check connections for printing or power issues and ensure proper tape installation․

Resolving Tape Jam Issues

A tape jam can occur due to misaligned or damaged tapes․ To resolve this, turn off the label maker and carefully remove the tape cassette․ Gently pull the jammed tape out without forcing it, as this could damage the internal mechanism․ Ensure the tape is properly aligned when reinserting it․ Avoid pulling the tape from the cassette forcefully, as this can cause further jams․ Regularly cleaning the label maker and using high-quality tapes can help prevent such issues․ Always refer to your device’s manual for specific instructions, as procedures may vary between models; Proper care ensures smooth operation and longevity․

Fixing Connectivity Problems

Connectivity issues with label makers often arise from Bluetooth or Wi-Fi misconfigurations․ Ensure your device is turned on and properly paired with your computer or mobile device․ Restart both devices and check the app or software for connection options․ Verify that Bluetooth is enabled and your label maker is discoverable․ If using a wired connection, inspect the USB cable for damage․ Download the latest software updates for your label maker and ensure the app is installed correctly․ Consult the user manual for specific pairing instructions, as procedures may vary by model․ Proper connectivity ensures seamless label printing and efficient operation․

Addressing Low Battery Warnings

If your label maker displays a low battery warning, turn it off immediately to conserve remaining power․ Replace the batteries with new, high-capacity ones, ensuring they are installed correctly․ For rechargeable models, connect the device to a power source using the provided cable․ Allow it to charge fully before use․ If the issue persists, check for battery compartment damage or corrosion․ Clean contacts with a soft cloth if necessary․ Store unused batteries properly to avoid drain․ Regularly updating your label maker’s software can also improve battery performance and prevent low-power errors․ Always use compatible batteries for optimal functionality․

Solving Printing Errors

When encountering printing errors, first ensure the label tape is correctly loaded and free from damage․ Turn the device off, wait a few seconds, then restart it to reset the system․ Check for paper jams and gently remove any obstructing tape․ Verify that the correct tape size and type are selected in the settings․ If issues persist, clean the print head with a soft cloth and update the label maker’s software․ For persistent problems, refer to the user manual or contact customer support․ Regular maintenance and proper care can help prevent printing errors and ensure consistent performance․ Always use compatible supplies for optimal results․

Creative Applications

Label makers enable creative projects like designing custom stickers, crafting gift tags, and creating event badges․ They add a personal touch to gifts, events, and personalized items․

Organizing Office Supplies

Label makers are invaluable for organizing office supplies, helping to declutter and streamline workflows․ By labeling file folders, binders, and storage containers, you can easily locate documents and supplies․ This reduces time spent searching for items and enhances productivity․ Use labels to categorize cords, cables, and plugs, eliminating confusion․ Clearly marked storage areas ensure everything has its place, promoting a tidy and efficient workspace․ Whether it’s organizing receipts, office equipment, or stationery, a label maker simplifies office management, making it easier to maintain order and focus on tasks․

Labeling Cables and Wires

Labeling cables and wires is one of the most practical uses for a label maker, helping to eliminate confusion and save time․ Clearly marked labels ensure you can quickly identify which cord belongs to which device, reducing the risk of disconnecting the wrong cable․ This is especially useful in offices, home theaters, or any setup with multiple devices․ Wrap durable labels around cables or attach them to wire organizers for a neat and organized setup․ Use symbols or color-coded labels for additional clarity, making it easier to manage complex systems and keep your workspace tidy․
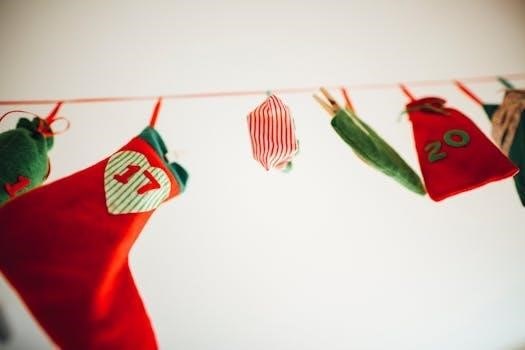
Creating Gift Tags

A label maker is a great tool for creating personalized and stylish gift tags․ Customize labels with names, messages, or festive symbols to add a personal touch to presents․ Use bold fonts or decorative symbols to make tags stand out․ Print on adhesive labels or fabric tape for durability․ Attach tags to gifts, bags, or cards for a professional and thoughtful look․ This is especially useful for holidays, birthdays, or special occasions․ With a label maker, you can quickly produce unique and elegant gift tags that enhance the presentation of your gifts and make them extra special for recipients․

Designing Custom Stickers

Designing custom stickers with a label maker is a fun and creative way to personalize items․ Use the device to print vibrant labels that can serve as stickers for scrapbooking, gifts, or decorations․ Choose from various tape sizes and colors to match your design needs․ Import images or artwork into the label maker software for unique visuals, and add text or symbols for a personalized touch․ Print and cut labels to desired shapes for a professional finish․ This feature is perfect for crafting, organizing, or adding flair to everyday items, making it easy to create one-of-a-kind stickers with precision and style․

Maintenance and Care

Regularly clean the label maker to prevent dust buildup․ Check and replace label tapes as needed․ Update software for optimal performance․ Store the device in a dry, safe place․

Cleaning the Label Maker

Cleaning your label maker is essential for maintaining its performance and longevity․ Use a soft, dry cloth to wipe down the exterior and remove any dust or debris․ For internal cleaning, gently use compressed air to clear the print head and tape compartment․ Avoid using harsh chemicals or moisture, as they may damage the device․ Regular cleaning prevents tape jams and ensures crisp, clear labels․ Always disconnect the power or remove batteries before cleaning․ Clean the device every 1-2 months or when visible dust accumulates․ This simple maintenance step keeps your label maker functioning smoothly and reliably over time․

Replacing Label Tapes

To replace the label tape, open the tape compartment by lifting the lid or pressing the release button, depending on your model․ Remove the empty cartridge and insert a new one, ensuring it clicks into place․ Align the tape correctly to avoid jams․ Purchase tapes compatible with your label maker to ensure proper functionality․ Refer to the user manual for specific instructions, as methods may vary․ Regularly replacing the tape ensures high-quality labels and prevents printing issues․ Always store unused tapes in a dry, cool place to maintain their adhesive properties and print clarity․ Proper replacement extends your device’s lifespan and performance․

Updating Software

Regular software updates ensure your label maker stays optimized with the latest features and compatibility․ To update, visit the manufacturer’s website and download the newest software version․ Connect your label maker to your computer via USB or Bluetooth, then run the update tool․ Follow on-screen instructions to install the update․ Some models may require restarting the device after installation․ Always use official software from trusted sources to avoid malware․ Updated software enhances performance, adds new functionalities, and improves compatibility with other devices․ Check for updates periodically to keep your label maker running smoothly and efficiently․ This ensures reliable operation and access to new features․ Regular updates are essential for maintaining optimal functionality and security․

Proper Storage Tips

Store your label maker in a dry, cool place away from direct sunlight to prevent damage․ Use the original packaging or a protective case to safeguard it during transport․ Remove batteries when storing for extended periods to avoid leakage․ Keep the device upright to prevent tape from unraveling․ Clean the printer head and exterior before storage to maintain functionality․ Store extra label tapes in a sealed bag to protect them from dust and moisture․ Avoid extreme temperatures or humid environments, as they can damage internal components․ Proper storage ensures your label maker remains in good condition and ready for use when needed․ Always follow manufacturer guidelines for optimal preservation․

Using Label Makers for Specific Tasks

Label makers excel in various specialized tasks, from printing shipping labels and organizing cables to creating event badges and custom stickers․ They enhance efficiency and precision in targeted applications, making them indispensable for specific organizational and creative needs․

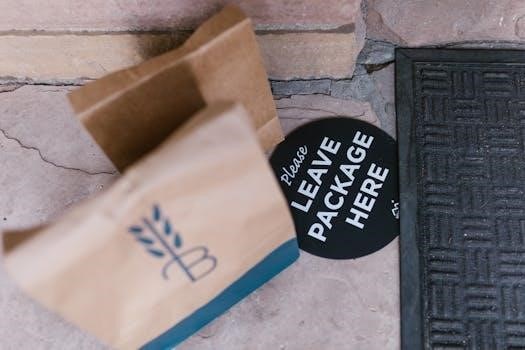
Printing Shipping Labels

Label makers are ideal for creating professional shipping labels quickly and efficiently․ Using thermal printing technology, they produce crisp, durable labels that withstand shipping conditions․ Many models, like the DYMO LabelWriter 450, support direct thermal printing without ink, ensuring cost-effective solutions․ Connect your label maker to a computer or mobile device via Bluetooth or USB, and use compatible software to design and print shipping labels․ Customize text, include barcodes, and select appropriate label sizes for packages․ This streamlines the shipping process, enhances readability, and ensures labels remain intact during transit, making label makers indispensable for businesses and individuals needing reliable shipping solutions․

Creating File Folder Labels

Label makers are essential for creating clear and professional file folder labels, enhancing office organization․ Use thermal label makers like DYMO or Brother to print durable labels that withstand daily use․ Simply type the folder name, select a font style, and print․ For added clarity, use bold text or symbols to categorize files․ Label makers also support color-coded labels, making it easier to distinguish between different projects or categories․ This ensures files are easily identifiable, reducing time spent searching and promoting a more efficient workspace․ Customize your labels with precision to maintain a tidy and professional filing system․

Labeling Storage Containers

Labeling storage containers is a practical way to enhance organization and accessibility․ Use a label maker to clearly mark contents, ensuring easy identification without opening containers․ Thermal label makers, such as DYMO or Brother models, produce durable labels that resist fading or peeling․ For outdoor or heavy-duty use, opt for waterproof or laminated labels․ Customize labels with bold text, symbols, or color-coding to categorize items like seasonal decorations or tools․ This system is ideal for garages, attics, or offices, helping to maintain a clutter-free environment and saving time when searching for stored items․ Labels can also indicate dates or usage instructions for added convenience․

Making Event Badges

Creating professional event badges is simple with a label maker․ Design and print custom badges with names, titles, and logos using thermal label makers like DYMO or Brother models․ Insert compatible label tape, type the text, and add symbols or logos for personalization․ Use bold fonts or larger sizes for readability․ Print badges on demand, ensuring efficiency for conferences, workshops, or meetings․ Some label makers, like the DYMO LabelWriter 450, offer quick printing speeds, while others, such as the Brother PT-D210, provide portable convenience․ This solution enhances professionalism and streamlines check-in processes, making it ideal for event organizers seeking to create a polished experience․

opalescence 20 instructions pdf

Opalescence 20 Instructions PDF⁚ A Comprehensive Guide

This guide provides comprehensive instructions for using Opalescence 20, a popular teeth whitening option. This concentration of carbamide peroxide is favored for its moderate whitening effect. It is often recommended by dentists for mild to moderate discoloration, offering a balance between effectiveness and sensitivity. Following the instructions closely is crucial for optimal, long-lasting results.

Opalescence 20 is a teeth whitening gel that employs a 20% concentration of carbamide peroxide. This particular formulation is designed for individuals seeking a noticeable improvement in their teeth’s whiteness, falling into the moderate strength range of at-home whitening options. It is a popular choice due to its balance between efficacy and gentleness, making it suitable for many users. The product is part of the Opalescence PF line, which is known for its ease of use and effective results. The ‘PF’ stands for Potassium Nitrate and Fluoride, which are included to help reduce sensitivity and strengthen enamel during the whitening process. Opalescence 20 is typically used with custom-fitted trays that are made by a dentist, ensuring a comfortable fit and effective application. The gel’s formulation allows it to stay in place within the trays, maximizing contact with the teeth for optimal whitening. It’s important to note that this product is manufactured in the USA by Ultradent and is designed to provide a professional whitening experience in the convenience of one’s home. It is available in various flavors, including Mint, Melon, and Regular, catering to individual preferences. Opalescence 20 represents a safe and reliable method for achieving a brighter smile when used as directed.

Understanding Carbamide Peroxide Concentration

Carbamide peroxide is the active ingredient in Opalescence whitening gels, and its concentration directly impacts the whitening power and treatment duration. Opalescence offers various concentrations, including 10%, 15%, 20%, 35%, and 45%. The 20% concentration, found in Opalescence 20, represents a mid-range option, providing a balance between efficacy and potential sensitivity. Higher concentrations, such as 35% and 45%, typically require shorter application times but may increase the likelihood of sensitivity. Conversely, lower concentrations, like 10% and 15%, may require longer wear times but are generally gentler on the teeth. The carbamide peroxide breaks down into hydrogen peroxide and urea, with the hydrogen peroxide being the active whitening agent. The concentration determines the rate at which this breakdown occurs. A 20% concentration allows for a moderate release of hydrogen peroxide, making it suitable for individuals who desire noticeable whitening without the intense effect of higher concentrations. Understanding these differences is important for selecting the appropriate Opalescence product based on individual needs and preferences. It is also crucial to follow the recommended application times for each concentration to ensure both effective whitening and minimize potential side effects such as sensitivity.

Opalescence 20 Application Time

The recommended application time for Opalescence 20 is typically between 2 to 4 hours per session. This duration is specifically designed to maximize the whitening effect while minimizing the risk of tooth sensitivity. Unlike higher concentrations that require shorter wear times, Opalescence 20 allows for a more gradual whitening process. It is crucial to adhere to this timeframe; exceeding the recommended time may not result in additional whitening benefits and could increase the likelihood of sensitivity. Conversely, wearing the trays for less than 2 hours may not yield the desired results. The 2-4 hour window provides sufficient time for the carbamide peroxide to break down and release the active whitening agent, hydrogen peroxide, effectively penetrating the tooth enamel. This application time is also a convenient option for many users, allowing them to incorporate the whitening process into their daily routine. It’s important to note that this time recommendation applies specifically to Opalescence 20. Other concentrations of Opalescence gels have different application times. For instance, Opalescence 10 is meant to be worn for 8-10 hours or overnight, while Opalescence 35 is intended for only 30 minutes. Always consult the product instructions or your dentist for specific guidance regarding wear time.

Loading Gel into Custom Bleaching Trays

Properly loading the Opalescence 20 gel into your custom bleaching trays is crucial for effective and comfortable teeth whitening. Begin by ensuring your trays are clean and dry. Use a syringe of Opalescence 20 gel, and apply a small amount along the inner surface of the tray, specifically where it will contact your teeth. A thin, continuous strip of gel, roughly the width of angel hair pasta, is sufficient. Avoid overfilling the trays, as excess gel can seep out and irritate your gums. A common guideline is to use approximately 1/3 to 1/2 of the syringe per application, distributed between your upper and lower trays. Gently tap the filled tray to help adapt the sides of the tray to the contours of your teeth. This ensures that the gel is evenly distributed and in optimal contact with your teeth’s surfaces. When inserting the trays into your mouth, be careful not to push too hard, as this could force the gel out. Once the trays are in place, use a clean finger or a soft toothbrush to remove any excess gel that may have squeezed out. This prevents the gel from coming into prolonged contact with your gums, reducing the risk of irritation. Remember, less is often more; a small amount of gel applied properly is more effective than an overfilled tray.

Pre-Treatment Preparation

Before beginning your Opalescence 20 teeth whitening treatment, proper preparation is key to maximizing its effectiveness and minimizing potential discomfort. Start by thoroughly brushing and flossing your teeth. This removes any plaque or food particles that might interfere with the whitening gel’s contact with your enamel. Clean teeth ensure the gel works directly on the tooth surface, yielding better results. Pay special attention to areas where plaque tends to accumulate. After brushing and flossing, rinse your mouth well with water to remove any remaining toothpaste or debris. It’s also important to have your custom bleaching trays cleaned and dried before applying the gel. Make sure they are free from any residue that might affect the whitening process. Additionally, it’s advisable to avoid consuming staining substances like coffee, tea, red wine, or dark-colored foods and beverages for at least an hour prior to the treatment. This prevents these substances from interfering with the whitening process. If you have any known sensitivities, consider using a desensitizing toothpaste a few days before starting the Opalescence 20 treatment. Finally, ensure you have set aside the appropriate amount of time for the treatment. Remember, for Opalescence 20, the recommended wear time is 2-4 hours, so plan accordingly. These pre-treatment steps will help ensure a safe and effective whitening experience.

Post-Treatment Care

After completing your Opalescence 20 whitening session, proper post-treatment care is vital to maintain your newly brightened smile and minimize any potential sensitivity. Once you remove the trays, rinse your mouth thoroughly with cool water to eliminate any remaining gel. Avoid swallowing any of the rinsed gel. Clean your custom bleaching trays with a soft brush and cool tap water; avoid using hot water as it may damage them. Allow them to air dry completely before storing them in their case. For at least an hour after the treatment, refrain from consuming any foods or beverages that might stain your teeth, such as coffee, tea, red wine, berries, or dark-colored sauces. It’s also advisable to avoid smoking or using any tobacco products during this period. If you experience any sensitivity, consider using a desensitizing toothpaste. If the sensitivity persists or becomes severe, consult your dentist. Continue to maintain a good oral hygiene routine by brushing and flossing regularly. This will help to keep your teeth clean and bright. Regular dental check-ups and cleanings are also important to ensure the health of your teeth and gums and to monitor the long-term results of the whitening treatment. Following these post-treatment care instructions will help you enjoy a whiter and healthier smile for longer. It’s also important to note that individual results may vary.

Managing Sensitivity

Tooth sensitivity is a common side effect of teeth whitening, including treatments with Opalescence 20. While it’s usually temporary, managing it effectively is key to a comfortable whitening experience. If you experience sensitivity during your Opalescence 20 treatment, the first step is to reduce the treatment time. Try wearing the trays for a shorter duration, such as 1-2 hours instead of the recommended 2-4. If the sensitivity persists, consider taking a day or two break in between whitening sessions, allowing your teeth to recover. Using a desensitizing toothpaste, specifically formulated to reduce tooth sensitivity, can provide significant relief. Apply it as you normally would when brushing your teeth. You can also use the desensitizing toothpaste before and after treatment; Over-the-counter pain relievers, such as ibuprofen or acetaminophen, can help manage sensitivity. However, consult your dentist or pharmacist for advice on safe and appropriate pain relief options. It is important to remember to not over use pain medications. Another method to reduce sensitivity is to use fluoride treatments; your dentist can provide these. If the sensitivity becomes severe or unmanageable, stop the whitening treatment and contact your dentist immediately. They can recommend alternative strategies or products to help you continue the treatment comfortably. It’s crucial to listen to your body and adjust the treatment according to your individual needs. Remember that sensitivity is typically temporary and will subside once the whitening treatment is completed. However, proper care and management are key to a pleasant whitening experience.

Opalescence 20 vs Other Concentrations

Opalescence offers various concentrations of carbamide peroxide, each designed to meet different whitening needs and sensitivities. Understanding the distinctions between Opalescence 20 and other concentrations is crucial for choosing the right product for you. Opalescence 10 is the lowest concentration, often used for overnight wear and is suitable for those with significant sensitivity. It provides a gentler whitening process, but may take longer to achieve desired results. Opalescence 15 offers a slightly stronger option, typically worn for 4-6 hours, providing faster results than Opalescence 10. On the other end of the spectrum, Opalescence 35 is a high concentration gel, intended for shorter wear times of 30 minutes and is recommended for experienced users. It delivers more rapid whitening but may increase the risk of sensitivity. Opalescence Quick PF 45 is also a higher concentration, designed for 15-30 minute wear times. Opalescence 20, positioned in the middle, is often considered a balanced option. It offers a moderate whitening pace while still being suitable for individuals with mild to moderate sensitivity. The wear time for Opalescence 20 is typically 2-4 hours, making it a convenient choice for many. The selection of the ideal concentration depends on your teeth’s level of discoloration, your sensitivity to whitening agents, and the time you are prepared to dedicate to the treatment. Always consult with your dentist for personalized guidance on selecting the appropriate Opalescence concentration for your specific needs.

Storage Guidelines for Opalescence PF Gels

Proper storage of Opalescence PF gels is essential to maintain their efficacy and ensure optimal whitening results. These gels, including Opalescence 20, contain carbamide peroxide which can degrade if exposed to excessive heat or light. According to the manufacturer’s guidelines, Opalescence PF 10, 15, and 20 syringes should be stored within a temperature range of 36°F (2°C) to 81°F (27°C). This means that the gels can be stored either in the refrigerator or at room temperature, provided the room temperature does not exceed the upper limit. Avoid storing the gels in direct sunlight or in areas with high humidity, as this can compromise their stability and effectiveness. When refrigerating, be sure to allow the gel to come to room temperature before use to ensure the gel flows smoothly from the syringe. If storing at room temperature, keep the gels in a cool, dark location, away from heat sources such as radiators or ovens. Always check the expiration date on the packaging before using the gel to ensure it is still within its usable period. Following these storage guidelines will help to maintain the potency of the Opalescence PF gels and ensure you achieve the best possible whitening results. Unused portions should be stored properly for future use, always adhering to the temperature guidelines.

Opalescence 20 Flavors and Options

Opalescence 20, like other products in the Opalescence PF line, offers a variety of flavors to enhance the teeth whitening experience. The available flavor options include Mint, Melon, and Regular, which is unflavored. The choice of flavor can significantly impact user comfort and preference during the whitening process. Mint provides a refreshing sensation, often preferred by those who enjoy a clean, cool taste. Melon offers a sweeter alternative, appealing to those who may find mint too strong. The Regular option, being flavorless, is ideal for individuals who prefer no taste during their whitening treatment or have sensitivities to certain flavorings. These flavor options are available across various Opalescence PF concentrations, including the 20% option, allowing users to select the combination that best suits their needs. Furthermore, the Opalescence PF line comes in various syringe sizes, providing flexibility in treatment duration. Whether you are looking for a subtle minty freshness, a fruity melon taste, or no flavor at all, Opalescence 20 aims to accommodate diverse preferences, ensuring a more pleasant and personalized whitening experience. The various flavors allow the user to choose what makes them most comfortable while achieving the desired teeth whitening results. Choosing the appropriate flavor can greatly enhance the overall treatment satisfaction.

Professional vs. At-Home Whitening

When considering teeth whitening, one must weigh the options between professional in-office treatments and at-home methods, such as those utilizing Opalescence 20. Professional whitening, typically performed by a dentist, often involves higher concentrations of whitening agents and may incorporate light or laser activation for faster results. These treatments are usually more expensive but offer immediate and dramatic changes. At-home whitening, on the other hand, provides a more gradual approach, allowing users to whiten their teeth in the comfort and convenience of their own homes using custom or pre-filled trays. Opalescence 20 falls into this category, offering a moderate concentration of carbamide peroxide suitable for daily use within a specified time frame. The primary advantage of at-home whitening is cost-effectiveness and flexibility, as individuals can control the application time and frequency according to their schedules and sensitivity levels. While professional treatments can deliver quicker results, they may also come with increased sensitivity. At-home whitening with products like Opalescence 20 allows users to manage sensitivity more effectively through gradual application and can be a more comfortable and convenient option for many. Both options have their merits, and the choice depends on individual needs, budget, and desired speed of results. Ultimately, consulting with a dental professional can help determine the most suitable whitening approach.

Where to Purchase Opalescence Products

Opalescence products, including the popular Opalescence 20, can be acquired through various channels, ensuring accessibility for those seeking at-home teeth whitening solutions. Primarily, these products are available through dental professionals, including dentists and orthodontists, who often offer them as part of a comprehensive whitening treatment plan. Purchasing directly from a dental office provides the benefit of professional guidance and support, ensuring proper usage and addressing any potential concerns. Additionally, a number of reputable online retailers specializing in dental supplies also stock Opalescence products. These online platforms often provide the convenience of ordering from home, with a wide range of options to choose from. However, it’s essential to verify the authenticity and expiration dates of the products when purchasing online to ensure you’re receiving genuine and effective items. Some well-known dental supply companies and pharmacies may also carry Opalescence products, although availability may vary depending on location. It’s important to note that while some over-the-counter teeth whitening products may be available, Opalescence is generally considered a professional-grade option, making it more readily available through dental professionals or specialized suppliers. Ultimately, the best approach is to consult your dentist who can guide you to reliable sources and ensure you select the right product for your needs.

14 ft bounce pro trampoline instructions

The Bounce Pro 14ft trampoline is designed for family fun and fitness, encouraging outdoor activity. It features a durable, UV-resistant jump mat and a robust steel frame, ensuring long-lasting enjoyment for your kids.

Overview of Bounce Pro Brand

Bounce Pro, a brand by Sportspower LTD, was established in 1992 with the aim of creating high-quality, affordable outdoor play products. They focus on safety and innovation, producing a range of trampolines designed to stand out from the competition. The brand is committed to encouraging active play and family fun through its products. Bounce Pro trampolines are available in various sizes, from 10ft to 17ft, offering options for different backyard spaces and family needs. They are known for their durable construction and safety features. Bounce Pro emphasizes safety by adhering to ASTM standards, ensuring their trampolines are independently tested and meet or exceed safety requirements. This commitment to quality and safety makes Bounce Pro a trusted choice for families seeking outdoor entertainment. They aim to provide long-lasting, enjoyable products that promote a healthy, active lifestyle for children. With the focus on both quality and affordability, Bounce Pro is a popular choice for many families looking to buy a trampoline.

Target Audience and Benefits

The Bounce Pro 14ft trampoline is primarily designed for families with children who are looking for a fun and engaging way to exercise outdoors. It’s ideal for kids who need to burn energy and improve their coordination and balance. The trampoline is also suitable for teenagers and adults seeking a low-impact workout option that’s fun and enjoyable. The benefits of using the Bounce Pro 14ft trampoline include enhanced cardiovascular health, improved muscle strength, and increased lymphatic drainage. It promotes a healthy, active lifestyle by encouraging children to spend more time outdoors, away from screens. The trampoline’s design with a safety enclosure ensures that users can bounce with confidence, reducing the risk of falls and injuries. Additionally, the trampoline offers a great way for families to bond and spend quality time together, engaging in active play. It’s a versatile piece of outdoor equipment that caters to various age groups and fitness levels, promoting physical well-being and entertainment.

Assembly of the 14ft Bounce Pro Trampoline

Setting up your Bounce Pro 14ft trampoline requires careful attention to the included instructions. Adult assembly is necessary, and following each step is essential for safety and proper use.

Step-by-Step Setup Guide

Begin by unpacking all components and verifying against the parts checklist. Start with assembling the trampoline frame, connecting the top rails securely; Next, attach the legs to the frame, ensuring each connection is firm and stable. Once the frame is complete, carefully position the jump mat and begin attaching the springs using a spring tool, evenly distributing them around the frame. Following this, assemble the enclosure poles and net, attaching them securely to the frame. Finally, double-check all connections for tightness and stability before allowing anyone to use the trampoline. It is important to follow the instructions provided in the manual for the correct order and procedure for assembly. Take your time and do not rush. Using the right tools will facilitate the process. If you encounter difficulties, refer to the manual or online resources for additional support.

Tools and Parts Checklist

Before starting assembly of your Bounce Pro 14ft trampoline, ensure you have all necessary tools and parts. You’ll need a spring tool, usually included, to attach the springs safely. A pair of work gloves can protect your hands during assembly. A rubber mallet may be useful for gently tapping parts into place. The parts list includes top rails, leg extensions, jump mat, springs, enclosure poles, net, and safety pads. Verify all parts are present and undamaged before beginning. Separate and lay out all components for easy access. This careful preparation will make the assembly process smoother and faster. If any parts are missing or damaged, contact the manufacturer immediately. It’s important to double-check all items against the manual’s list to avoid delays or frustration during setup. Make sure you have a clear and spacious area to work in.

Safety Features and Guidelines

The Bounce Pro 14ft trampoline includes a safety enclosure, promoting safe usage and preventing falls. It meets ASTM standards and supports a 220lb weight capacity, with adult supervision recommended at all times.

Enclosure System Description

The Bounce Pro 14ft trampoline features a curved, classic six-pole enclosure system, designed to enhance safety while maximizing the jumping area. This enclosure is crucial for preventing accidental falls and ensuring that users remain within the trampoline’s boundaries. The netting is constructed from durable, high-quality materials, providing a secure barrier without compromising visibility. The poles are padded for added protection, minimizing the risk of injury upon impact. This robust system is easy to install, integrating smoothly with the trampoline’s frame. The enclosure is a key component in creating a secure environment for children and adults alike, allowing them to enjoy the trampoline with peace of mind. This design is specifically created to provide a safe and enjoyable experience, allowing users to jump with confidence. The enclosure net is designed to be tear-resistant and durable. This thoughtful design ensures that the trampoline is both fun and secure for all users, big or small. The curved design provides a spacious feel, and the durable materials ensure long-lasting protection. The enclosure is an integral part of the Bounce Pro’s commitment to safety.

Weight Capacity and ASTM Standards

The Bounce Pro 14ft trampoline is designed with a weight capacity of 220 lbs, ensuring safe use for a range of users. This limit is carefully determined to maintain the structural integrity of the trampoline and prevent accidents. It is crucial to adhere to this weight limit to ensure safe operation and to avoid damage to the product. Furthermore, all Bounce Pro trampolines are rigorously tested to meet or exceed ASTM (American Society for Testing and Materials) safety standards. These standards are a benchmark for safety and quality in recreational equipment. The trampoline is independently tested by third-party labs to confirm compliance with these regulations. This ensures that the materials and construction of the trampoline meet the highest requirements for safety and durability. The testing process includes evaluations of the trampoline’s structural strength, stability, and overall safety features. This commitment to safety standards is a key element of Bounce Pro’s dedication to producing high-quality, reliable products for families. This dedication to these standards provides customers with confidence in the safety of the product. The trampoline undergoes multiple tests to ensure it meets the required safety metrics. This ensures a safe experience for all users.

Recommended Usage and Supervision

It is highly recommended that adult supervision is always present when the Bounce Pro 14ft trampoline is in use, especially when children are jumping. Constant monitoring helps prevent accidents and ensures that the trampoline is used safely. It is crucial to establish clear guidelines for trampoline usage, including the number of users at any given time. Generally, only one person should be on the trampoline at a time to avoid collisions and injuries. Make sure that the users are aware of the safety rules before jumping, and always avoid any dangerous behavior. Users should avoid somersaults or other risky maneuvers, and it’s important to keep the trampoline free from any foreign objects. Any toys or items should be removed from the mat before use. It is important to regularly check the trampoline for any signs of wear or damage to the frame, springs, or enclosure. Proper supervision helps to ensure that users enjoy the trampoline in a safe environment. This practice is vital for a fun and safe trampoline experience. Always encourage proper use of the equipment. Following these guidelines can make your family time more enjoyable and safer.

Maintenance and Care

Regularly inspect your trampoline for wear, damage, or loose parts. Check the mat, springs, frame, and enclosure before each use. Proper maintenance ensures a safe and lasting trampoline.

Regular Inspection Procedures

To ensure the ongoing safety and longevity of your Bounce Pro 14ft trampoline, consistent and thorough inspections are crucial. Before each use, visually examine the entire structure. Begin by checking the jump mat for any tears, rips, or signs of excessive wear. Pay close attention to the stitching and attachment points. Next, inspect the springs for any stretching, damage, or detachment from the frame. Ensure that all springs are securely connected and in good working order. The frame itself should be examined for any bending, rust, or loose connections. The legs and joints must be stable and firmly secured. The enclosure net should be scrutinized for any rips, tears, or loose attachments to the poles; Make sure the zipper or entrance is functioning correctly. Finally, always confirm that all bolts, screws, and other fasteners are tight and secure. Addressing issues promptly will prevent them from escalating into more serious problems and ensures that your trampoline remains safe for family use. Regularly following this inspection routine guarantees worry-free bouncing.

the president special instructions

Presidential Special Instructions⁚ An Overview

Presidential special instructions, often manifested through executive orders, are directives issued to manage the operations of the federal government. These orders allow the President to act swiftly, shaping policy and directing the executive branch’s actions. They are a key tool of presidential power.

What are Presidential Special Instructions?

Presidential special instructions, frequently enacted through executive orders, are formal directives issued by the President of the United States. These instructions are designed to manage the operations of the federal government and guide its various departments and agencies. They represent a powerful tool for the President to implement policy changes and enforce existing laws within the executive branch. These instructions are not laws passed by Congress, but they carry significant weight within the executive branch, directing how federal resources are allocated, how laws are interpreted, and how government functions are carried out. They cover a broad spectrum of topics, from national security to environmental protection, and are meant to ensure that the executive branch operates effectively and in line with the President’s agenda. They are typically numbered consecutively and are published in the Federal Register.

Executive Orders

Executive orders are official documents issued by the President to manage the federal government’s operations. They are a key tool for presidential action, directing the executive branch in implementing policies and managing its functions.

Definition of Executive Orders

Executive orders are directives issued by the President of the United States, serving as a primary tool to manage the operations of the federal government. These official documents are numbered consecutively and are a form of presidential action that carries legal weight within the executive branch. Unlike legislation passed by Congress, executive orders do not require congressional approval, although they are subject to judicial review and may be challenged in court. They are used to implement existing laws, create new policies, and direct the executive branch in its daily functions. The issuance of an executive order is a significant exercise of presidential power, allowing the President to act swiftly and shape policy without needing the legislative branch’s consent. Executive orders are a way for the President to manage government and direct the executive branch. These orders are a key way for the President to exert control and influence.

How Executive Orders Function

Executive orders function as a mechanism through which the President directs the executive branch of the US government. Upon the President signing an executive order, it’s transmitted by the White House to the Office of the Federal Register. These orders carry legal authority and dictate the execution of laws and policies. They are often used to manage the daily operations of the federal government. They also have the power to create new policies within the bounds of existing laws. They can be used to implement legislation and guide the actions of federal agencies. The orders are not acts of Congress, so they do not need approval from that body. They are, however, subject to judicial review and can be challenged in the courts. The executive order serves as an important tool for the president to achieve his political and administrative goals.

Issuance of Executive Orders

The issuance of executive orders begins with the President, who drafts or directs the creation of a specific order. Once finalized and signed by the President, the order is then officially issued by the White House. After signing, the order is sent to the Office of the Federal Register. These orders are numbered consecutively and become part of the public record. They are used to direct federal agencies and officials in the execution of policies. The power to issue executive orders is an inherent part of the President’s role in the executive branch. They can vary greatly in scope and impact, ranging from relatively minor administrative adjustments to major policy changes. The President has the authority to issue orders unilaterally, but they must operate within the constraints of the Constitution and existing laws.

The Role of the White House

The White House plays a crucial role in the issuance and management of presidential actions. It’s responsible for drafting, finalizing, and officially issuing executive orders. The White House ensures these orders are properly processed and distributed.

White House and Executive Orders

The White House is central to the entire executive order process, serving as the operational hub. It’s where the process begins, with presidential directives often originating from White House policy teams. These teams work to translate the President’s vision into concrete policy proposals, which then may take the form of an executive order. The White House legal counsel reviews the proposed order to ensure it is within the president’s authority and consistent with existing law. After the President signs the order, the White House is responsible for transmitting it to the Office of the Federal Register for official publication. This ensures public access and transparency. The White House also plays a role in tracking the implementation and impact of executive orders across the executive branch, ensuring they are carried out effectively. Thus, the White House coordinates all aspects of the executive order, from conception to implementation.

Historical Context

The use of presidential orders has evolved significantly throughout history. The form, substance, and number of these orders have varied dramatically across different presidencies, reflecting changing political landscapes and priorities.

Evolution of Presidential Orders

The evolution of presidential orders, particularly executive orders, reveals a fascinating journey in American governance. Initially, these directives were primarily administrative tools, focused on managing the day-to-day operations of the federal government. Early presidents used them sparingly, often for specific, limited purposes. Over time, the scope and impact of executive orders expanded significantly. As the presidency grew in power and influence, so did the use of these directives. The 20th century witnessed a marked increase in the issuance of executive orders, often addressing major social, economic, and national security challenges. Presidents like Franklin D. Roosevelt utilized executive orders extensively during the Great Depression and World War II. This period saw a shift towards using these orders to enact substantial policy changes. Modern presidents continue to use them, navigating a complex political environment, and addressing a wide range of issues. The evolution reflects the changing dynamics of the presidency and its role within the American political system.

Variations in Form and Substance

Presidential orders, encompassing executive orders, vary significantly in both form and substance. Historically, the format has evolved, adapting to the changing needs of the presidency and the federal government. Early orders were often concise and focused on specific administrative matters. However, over time, they have become more complex, addressing a wider array of policy issues and often containing detailed instructions. The substance of these orders also varies dramatically. Some are narrow in scope, dealing with routine operational aspects of government agencies. Others are far-reaching, impacting vast segments of the population or addressing critical national issues. The topics range from national security and foreign policy to domestic social programs and economic regulations. These differences reflect the president’s priorities and the prevailing political climate. This variation in form and substance underscores the flexibility and adaptability of presidential orders as a tool of executive power.

Presidential Actions

Presidential actions are carried out through various documents, including executive orders, memoranda, and proclamations. These actions direct the executive branch and manage federal operations, reflecting the president’s policy agenda and priorities.

Presidential Documents and Tables

Presidential documents encompass a range of official directives, including executive orders, memoranda, and proclamations, each serving a distinct purpose in managing the federal government. Executive orders, numbered consecutively, are perhaps the most well-known form, used to direct the executive branch’s operations and implement policy. Memoranda, often less formal than executive orders, provide instructions to federal agencies, while proclamations may announce policies or recognize national events. Disposition tables provide detailed information about these presidential documents, starting with those signed by Franklin D. Roosevelt, offering a historical record of presidential actions. These tables are crucial for understanding the evolution of presidential directives, showing variations in form, substance, and frequency of issuance over time. Furthermore, they allow for a comprehensive analysis of a president’s actions and priorities during their term, serving as an important resource for scholars and the public. The use of these documents reflects the president’s ability to impact government operations.

Recent Activity

Recent activity shows President Biden signing 19 executive orders in 2024, while Donald Trump anticipates using many executive orders upon returning to office. This highlights the ongoing, pivotal role of these presidential directives.

Executive Orders Under Biden

President Joseph R. Biden Jr. has actively utilized executive orders during his term, demonstrating their continued relevance in modern presidential governance. In the year 2024 alone, President Biden signed 19 executive orders, numbered from EO 14115 through EO 14133. These orders span a variety of policy areas, reflecting the broad scope of presidential authority. Biden’s use of these directives underscores their role as a tool for implementing policy objectives quickly and efficiently. It is important to note that these orders are official documents through which a president manages the operations of the Federal Government. The number and substance of executive orders signed by a president may vary greatly throughout their term, yet each one holds the same authority as a presidential directive. The use of executive orders by President Biden highlights their function as a means of presidential direction and management within the executive branch. The consistent issuance of these orders indicates their vital importance in the daily governance of the United States. He has used them to address various issues, leaving his mark on the executive branch through these formal directives.

Trump’s Anticipated Use of Executive Orders

President-elect Donald Trump is expected to make significant use of executive orders upon entering office for his second term. Trump has publicly vowed to begin signing a large number of these directives from the very first day of his presidency. This indicates a clear intention to utilize executive orders as a primary method for swiftly implementing policy changes and achieving his administration’s goals. The anticipation surrounding Trump’s planned use of executive orders suggests a potential for significant shifts in policy and governmental operations early in his term. His previous presidency also showed his inclination towards using executive orders; This approach signals a strategy of rapid action through presidential directives, intended to quickly establish his policy agenda. The speed and nature of these orders are expected to be impactful, potentially altering the existing landscape of federal operations and regulations. The approach to executive orders will likely be a hallmark of his administration’s initial direction, setting a tone for his term.

keurig mini instructions

Initial Setup of Keurig Mini

Before brewing your first cup‚ it’s essential to properly set up your Keurig Mini. This involves carefully unboxing the unit‚ identifying all components‚ and preparing the water reservoir for initial use. Following these steps ensures optimal performance.

Unboxing and Component Identification

Upon unboxing your Keurig Mini‚ carefully remove all packaging materials and ensure you have all the necessary components. The key items to identify are the main brewer unit‚ the removable drip tray‚ and the water reservoir which is usually located at the back. Familiarize yourself with the K-Cup pod holder‚ which is where you will place the coffee pods. You should also locate the handle for lifting and closing the pod holder. Check for any additional materials like the user manual or quick start guide. Inspect all parts for any visible damage that might have occurred during shipping. Make sure the power cord is intact and ready for connection. Understanding each part and its function is critical for smooth operation. The compact design is meant to be user-friendly‚ so take the time to get to know your new brewer.

Preparing the Water Reservoir

Before using the Keurig Mini‚ prepare the water reservoir by first removing it from the back of the machine. Rinse the reservoir thoroughly with clean water to remove any dust or debris from manufacturing or shipping. Avoid using soap or detergents‚ as these could leave residue that could affect the taste of your coffee. Fill the reservoir with fresh‚ filtered water to the fill line indicated on the container. Do not overfill or underfill the water reservoir. Ensure it is securely placed back onto the brewer‚ making sure it’s properly aligned to avoid any leaks or malfunctions. The water reservoir is crucial for the brewing process‚ so taking the time to properly fill it will ensure that your Keurig functions as intended. This initial water fill prepares your machine for its first use and future brews.

First Use Procedure

The first use of your Keurig Mini requires a simple procedure. Begin by running a rinse cycle without a K-Cup‚ followed by correctly inserting a K-Cup pod for brewing. This ensures proper functionality.

Running a Rinse Cycle Without a K-Cup

Prior to brewing your initial cup of coffee‚ it is vital to run a rinse cycle on your Keurig Mini. This process helps to clean the internal components and eliminate any manufacturing residues that may be present. First‚ ensure the water reservoir is filled to the appropriate level. Then‚ close the lid without inserting a K-Cup pod. Activate the brewing process as if you were making a regular cup of coffee. The machine will dispense hot water‚ which you should discard. Repeat this process once or twice to ensure thorough cleaning. This initial rinse is crucial for optimal taste and performance and prepares your Keurig Mini for its first actual brew. This step is also necessary to ensure any factory particles are removed from the brewing system.

Inserting a K-Cup Pod Correctly

Properly inserting a K-Cup pod is essential for a successful brew with your Keurig Mini. Begin by lifting the handle to open the pod holder. Take a K-Cup pod and place it into the holder‚ ensuring it sits correctly within the designated space. Do not remove the foil lid of the K-Cup pod; this is pierced during the brewing process. Once the pod is in place‚ gently lower the handle until the lid is completely closed. The brew indicator light will illuminate‚ signaling that the machine is ready to begin brewing. Avoid forcing the handle‚ as this could damage the unit. The pod should fit snugly‚ and the machine should close smoothly. This correct insertion will prevent any issues during the brewing cycle and deliver a perfect cup of coffee every time.

Brewing Process

The brewing process with a Keurig Mini is straightforward. It involves selecting your desired brew size‚ which ranges from 6oz to 12oz‚ and then initiating the brewing cycle. Following these steps will ensure a perfectly brewed cup.

Selecting Brew Size (6oz to 12oz)

The Keurig Mini offers the flexibility to select your preferred brew size‚ allowing you to customize your coffee experience. This model typically provides options ranging from a smaller 6-ounce cup to a larger 12-ounce serving. To choose your desired size‚ you’ll need to familiarize yourself with the button or mechanism that controls this setting on your specific Keurig Mini model. Often‚ this is done by pressing a designated button multiple times‚ or by using a lever or dial.

It’s important to note that the amount of water you add to the reservoir should correspond with your brew size choice. A smaller cup size will require less water‚ while a larger cup will need more. Always ensure you are adding sufficient water to the reservoir for the intended brew size to avoid any issues during the brewing process. Selecting the correct brew size is important for the taste‚ strength‚ and consistency of your coffee. Following this step ensures that you enjoy your coffee at the desired volume and intensity.

Initiating the Brewing Cycle

Once you’ve selected your preferred brew size and inserted a K-Cup pod correctly‚ you are ready to begin the brewing cycle. The process is generally initiated by pressing a designated ‘brew’ button or by lowering the handle completely to close the lid‚ depending on your specific Keurig Mini model. When this button is pressed or the lid is completely closed‚ the machine will begin to heat the water and force it through the K-Cup pod.

It is crucial to ensure that the lid is completely closed before starting the brewing cycle to prevent any spills or malfunctions. During the brewing process‚ the brew indicator light will typically illuminate‚ and you may hear the machine working. Once the brewing cycle is complete‚ the light may turn off or change color‚ and the flow of coffee will stop. Wait until the brewing process is fully completed before removing your mug or lifting the handle. Following these instructions carefully will ensure a smooth and successful brewing experience.

Maintenance and Care

Regular maintenance is key to keeping your Keurig Mini functioning optimally. This includes cleaning the exterior‚ descaling regularly‚ and ensuring all parts are free of coffee residue. Proper care extends the life of your brewer.

Cleaning the Exterior of the Brewer

Maintaining a clean exterior for your Keurig Mini is simple and crucial for both aesthetics and hygiene. Begin by ensuring the brewer is unplugged and completely cooled down before starting any cleaning process. Use a soft‚ damp cloth to wipe down the outer surfaces‚ paying special attention to areas that might accumulate splashes or spills‚ such as around the brew head and drip tray area. For stubborn stains‚ a mild solution of soap and water can be used; however‚ be careful not to let any liquid seep into the inner workings of the machine. It is essential to thoroughly dry all surfaces with a clean‚ dry cloth after wiping. Avoid using abrasive cleaners or harsh chemicals‚ as these can damage the finish of the brewer. Regular cleaning will prevent the build-up of grime and keep your Keurig Mini looking new and ready for your next brew. Remember to clean the handle and base as well‚ ensuring all parts are free of any residue.

Descaling the Keurig Mini Regularly

Descaling your Keurig Mini is a crucial maintenance step to ensure its longevity and optimal performance. Over time‚ mineral deposits from water can accumulate inside the machine‚ affecting the brewing process and the taste of your coffee. Regular descaling helps remove these deposits and keeps your Keurig functioning smoothly. The frequency of descaling depends on the hardness of your water; however‚ it’s generally recommended every 3 to 6 months. Use a descaling solution specifically designed for coffee makers or a mixture of white vinegar and water. Follow the instructions provided with your descaling solution carefully‚ which usually involves running the solution through the brewing cycle multiple times‚ followed by a clean water rinse. This process ensures all residue is cleared. Ignoring descaling can lead to reduced brewing speed‚ inconsistent temperatures‚ and a decline in the overall quality of your coffee. Regular descaling will not only improve the taste of your coffee but also extend the life of your Keurig Mini.